This is pretty helpful to me, since I focus a lot on the final product and have a hard time slowing down to enjoy the process.
I've taken photos of my first zentangle step by step. I used two pens: a Sharpie fineliner and a Sakura Pigma 1.
This page is a pretty important one to me since it is the inside cover of my new journal ie: it had to be PERFECT.
Is it? You be the judge!
The lighting is a bit wonky in these photos, despite my attempts at brightening them. I hope you'll get the general idea...
 |
| I started out by drawing a big S and then drawing stripes through it to break up the page a little. |
 |
| Coming up with different patterns for each section was the hardest part of this... |
 |
| Little by little it started to take form. I obviously tend toward organic shapes! |
 |
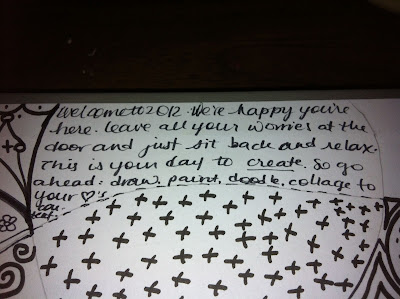
| Since this is the inside cover of my new journal, I wanted to include a little blurb for inspiration. |
 |
| Really taking shape now! You can still see the general shape of the S although I made a point to not outline it directly. |
 |
| Et Voila! The finished product! My favourite pattern is the brick. I also like the face on the left, and the tree, and the rose.. and the... just kidding. I'm really happy with how this turned out! |

Love this!! Super cool and interesting!!!
ReplyDeleteThanks! It was so fun! I'm definitely going to be incorporating zentangles into my work from now on!
ReplyDeleteAwesome !!!!!!! you did a fabulous job.....
ReplyDeleteNice job Shannon, I love it.
ReplyDeleteI Love your first tangle. So energetic and original. I think you will really like the tangles Fescue, Flux, and Quabog. They are all very organic forms.
ReplyDeleteTangle on,
Melissa CZT #6
@Melissa
ReplyDeleteCool! I just came across tanglepatterns.com so I'm going to look them up right now!
Thanks!