Wednesday 27 February 2013

Hello Mrs. Brady!

I was definitely a fan of The Brady Bunch back in the day, but I think that I love even more now that I appreciate the kitschy style and cute banter!

In particular, I LOVE Mrs. Brady's hair. It always looks effortless.

It seemed that she could rock a mullet with sophistication and grace. I think the long tresses at the back give her a soft, angelic quality!

I'm starting to grow my hair out (sorry Mom!) from a pixie into something quite a bit longer.

I've been searching around for styles to help me stay the course during those dreaded "in-between" stages.

Hence, the Mrs. Brady.

Cute, right?

Slightly angelic!!

Completely adorable!!

Looks easy to take care of too, right?

And doesn't she look great in this style too?
Thanks, Mrs. Brady, for inspiring me through many thoughts of dread regarding upcoming "in-between stages."

Monday 25 February 2013

New Journal Covers

Inspired by my friend Tammy Murdock at Embellish Studios, I am exploring the art of making soft-covered journals.

I am going to start carrying one around to see how I like it. I'm used to hardcover journals, so this might take some getting used to, especially in the sense of durability!

I've recently collaged on some painted Tyvex which I am going to use for my first journal. I am going to attempt to sew in my signatures using my sewing machine and a leather needle. I'll keep you posted :)

Here is the cover in its finished state. Now to make it into a journal!

A close-up of the collage elements. You can see that I used my sewing machine to secure some of the collage bits. 
 
The view from the top of the cover. I love the marbly texture of the blue paint on the green background. 

Friday 22 February 2013

Alphabet Doodles

I'm always playing around in my art journal. ALWAYS.

While I was browsing tattoos on Pinterest (yes, I'm in the market for a new tattoo - my biggest one yet!), I started thinking that I would like to develop my own typeface one day.


I started playing around in my art journal, and got to some shapes that I really like.


I really like the a, the l, the e, and the x. 

Not crazy about the d, the w, the f and the t. 

I had fun with colour, too - can you tell?


Wednesday 20 February 2013

More Bound Journals!

I've been having a GREAT time making more beaded-spine journals in my studio!

Number one: Green and Purple
Various textured papers in purple, green, and brown (on the inside cover) with glass bead accents.


Number two: Burgundy and Blue
Another favourite, for sure!

The overall effect is pretty awesome with the rich burgundy and steel blue!

The inside spine. You can see that the paper is a lovely, thick, natural style. 

I am SO in love with this inside paper - and it's metallic! Heavenly. 

A close-up of the beading detail. I absolutely love these beads together!

Both #1 and #2 are available here in my etsy shop. 


Monday 18 February 2013

I'm Learning: Watercolour Trees

I've been working on my watercolour techniques.

I've always liked the way that watercolours dry with so much texture. The texture seems to be a result of the amount of water used combined with the amount of pigment. Whatever the equation, I love it!

I'm generally a mixed media artist who usually works in collage and abstract, so painting or drawing ANYTHING is a huge challenge and triumph for me!


I did use an image to "copy" in order to create the first tree here:


This second tree was a little more adventurous for me...

I particularly like the ground around the tree.

For the third tree, I wanted to give it a lean, and I think I did a pretty good job!

Friday 15 February 2013

Inspiration Card Deck Swap

I'm participating in Jessica Brogan's Inspiration Deck Swap again!

I must tell you that creating a whole deck of cards like this is so satisfying and fun. I am even considering registering TWICE and making a SECOND deck to swap!

Here are some pics of my deck. I have four messages that I repeated 13 times each. (This is the minimum number of different messages. Last swap I did 52 different quotes and found that it was that aspect of the swap that was the least amount of fun for me. This time, I kept it simpler...)

(Check out my Inspiration Deck from the last round here.)


I love how the ink reacted with the spray fixative that I used!
Materials: Acrylic paints, stencils, StayzOn ink (for lettering)

My four messages:
Explore
Do it now
Let go
Pursue (this one is meaningful to me this year.)
The backs of the cards: I glued all of the cards onto maps,
and then stamped each with a compass in a more haphazard, offset manner.
I will add my contact info to this side. 

Wednesday 13 February 2013

Help? Advice? Anyone?

I need some tips on how to display my journals at the upcoming Blim Craft Show.

The tricky thing is that all of my journals are different. I can't stack them or bury them behind one another; I want to show all of them because they are all unique - colours, patterns, images, collages, fabrics, etc.

Here is my display from A Real Piece of Work last November. You can see on the right side of the photo that I had the journals all standing up so that shoppers could come up to the table and from their view, see part of each of the designs. (The wooden stands won't be at this next show, so try and ignore those...)

I need an idea that uses VERTICAL space instead of table space (as my table is going to be tiny!)

Thanks - ANY idea is very welcome!!!


Tuesday 12 February 2013

A True Labour of Love (And a Bit of Obsession!!)

I've been working on this journal since before Christmas - step-by-step, that is. 

Before Christmas, I painted on a sheet of Tyvek with acrylic paints: light brown and gold. I marbled it and gave my design some real depth.

Last week I collaged onto my Tyvek sheet, sewed the pieces into place, and cut the sheet down to the size of a journal. I even sewed a piece of crocheted trim onto the bottom of what would be the cover of my journal.


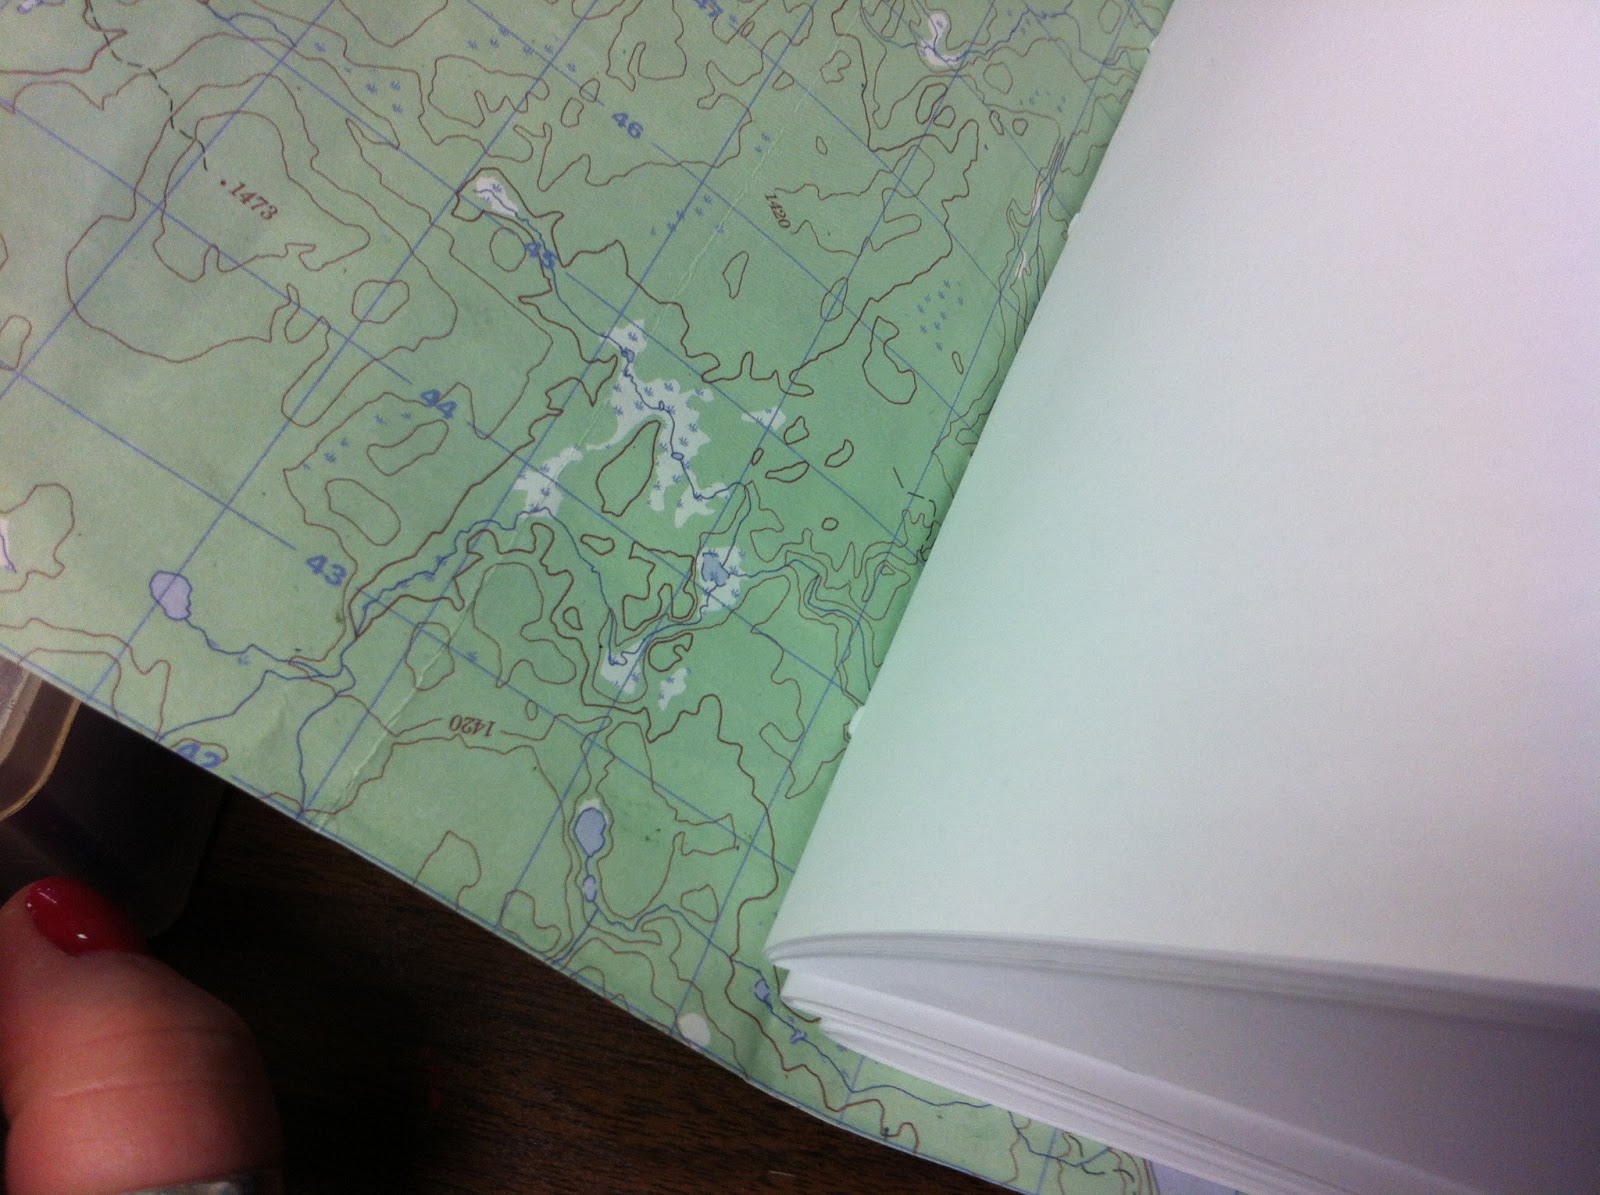
On the other side of the Tyvek, I adhered a piece of map with a spray contact cement. This type of adhesive gives me a completely seamless adhesion that makes my material look like it was always just one layer. 


I made three signatures from plain white paper and sewed them in. 


I used pink string because of the pink in the focal point of the cover - La Dama Loteria card. 


My journal was done! Beautiful with a soft, flexible cover. Or so I thought...

I decided to go further with this journal - customising it even more. 


I bought some pink bias tape, and decided to give the covers a hand-stitched edge. 
This edge made the journal look at lot more finished to me...


I really did hand-stitch the edges. And on each corner I made a little "x" to add even more character. 


This made a huge aesthetic difference, even on the inside. 


So here it is. My finished journal: 60 blank white pages inside, a soft, flexible cover with a ridiculously cute hand-stitched edging around it. 

It took me about three hours in total from start to finish. Three hours well spent, I think! :D

Available here in my etsy shop :)

Monday 11 February 2013

New Collage Sheets - Cards and Mixed Media Goodness

You may have noticed that I've added a page to my blog called Collage Sheets. I've also added a button for Collage Sheets to the right ------------->

I have some AWESOME collage sheets for you to play with.

Here are some of the ones that I'm selling (for almost free! Seriously!) Click here to buy some nifty collage pages for yourself!

Note: The images here are not the same quality as the full-resolution images that will be sent to you upon purchase.
I love these Mexican Loteria cards.
If I could have a whole deck, I would put them all together into wall art.
You'll receive a high-res scan of these five cards. 
Creepy face cards - I've used these on book covers and in collage. They're great!

A portion of a collage that I did in pinks and reds.
You'll get the entire image. 

A portion of a collage that I did in greens and browns.
Again, you'll get the entire image. 
A portion of a collage that I did in blue with a couple of butterflies (stamped and cardstock).
Again, you'll get the entire image. 
A portion of a gelli print that I did in reds, black, and lime green.
Again, you'll get the entire image.
A portion of a collage that I did in oranges and reds.
Again, you'll get the entire image.
The five mixed-media collage pages above (in their full form - these are just snippets) are sold in a 5-pack for only 5 bucks! (Click here to browse.)

Friday 8 February 2013

Postcard Swap Deadline!


Hello lovelies!!

Just a friendly reminder that today is the last day to send out your cards for the International Mixed Media Postcard Swap V.3.0!

I LOVE doing this Swap and I hope you are loving it too!

Here are some of the cards that I received recently:

So many layers and textures!
The top right is actually an ENVELOPE that one of my postcards came in. How cool is that?!

Beautiful, right?

Here's the envelope. It makes me feel badly about sending out plain white ones,
when I could just spritz some colour and have a little masterpiece!
 
Look at the texture on this one - I'm a sucker for depth and textures!


Wednesday 6 February 2013

Making Books

I attended a workshop a couple of weeks ago at Stampadoodle in Bellingham, WA on bookbinding.

I've made loads of books in the past with all sorts of different bindings, but one thing about this workshop had piqued my interest: the use of BEADS on the spines.

First of all, the PAPERS... ahhhh. I love the Burgundy with Metallic Gold...

The spine paper is green suede paper. And the beads are of course hand-picked by myself.
The silvery beads at the top and bottom have rhinestones in them - sparkly and glitzy!
At the top, I took the binding threads and woven them into a tiny, knotted macrame pattern. 

I added decorative flaps on the outside of each signature.  
The inside covers are covered with a soft, wrinkly paper. It is so soft that it actually feels like fabric. 

A full view of the spine and covers. This truly is my most favourite journal yet!
Available in my etsy shop :)